If you are using Microsoft Entra ID (or Azure Active Directory) for Single Sign-On, then this page will walk you through how to set this up.
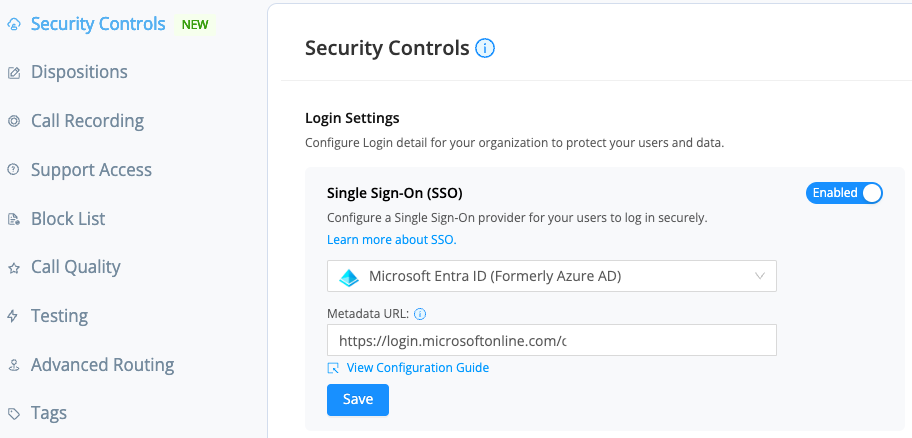
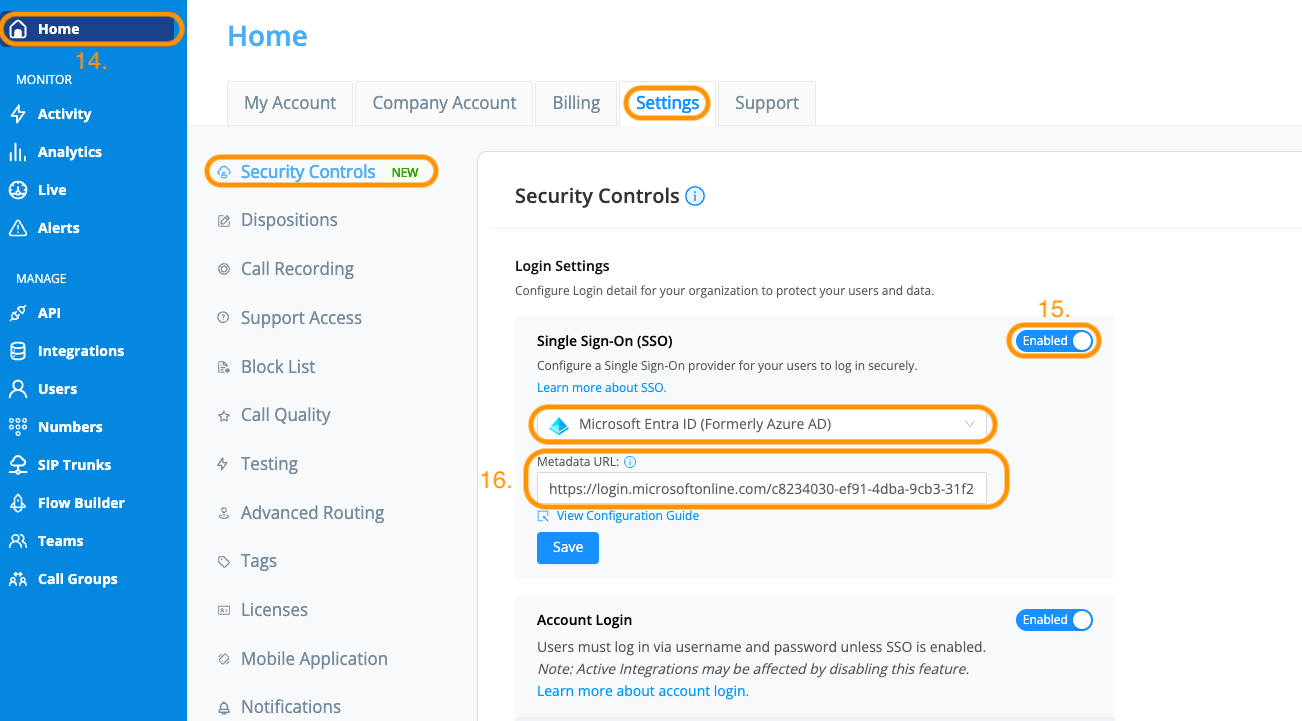
In order to set this up, an Administrator must navigate to Home → Settings → Security Controls. From here you will see the Login Settings section. In this section, update the dropdown for Single Sign-On (SSO) to SAML and fill in the appropriate details before clicking Save.
To get started with setting up SSO through Microsoft Entra ID we will need a few key pieces of information. You will need to add a new Enterprise Application within Microsoft Entra ID in order to get this information.
-
Metadata URL
- This is your identity provider's metadata URL. See Create an app registration in Azure section below for instructions on how to set this up for Microsoft Entra ID.
Once set up to sign in via SAML, your users will be able to sign in to Genius with their credentials from their company account. Please make sure the email for their user in Genius matches the email on their company account or the user may encounter errors when logging in.
Account Login
If you want your users to be automatically forwarded to login with SSO (so they do not need to click a “Login with SSO button” you'll need to turn off Account Login.
Account Login is the ability to use your old AVOXI Genius credentials to login with the password managed through AVOXI. Once SSO is enabled, ideally you should turn off Account Login as that will automatically forward your users to sign in with your SSO provider when they attempt to login.
You may want to leave Account Login enabled if you have additional accounts which are not directly tied to a user that you use. These might be things like Administrative accounts or Integration accounts which are not representative of a specific person.
Set up in Entra through the Microsoft Entra Gallery (easiest method)
Create an app registration in Azure
In order to set up Microsoft Entra ID to support SAML 2.0 you will need to go through a few steps in Microsoft Azure to get everything enabled.
- Sign in to Microsoft Entra Admin Center
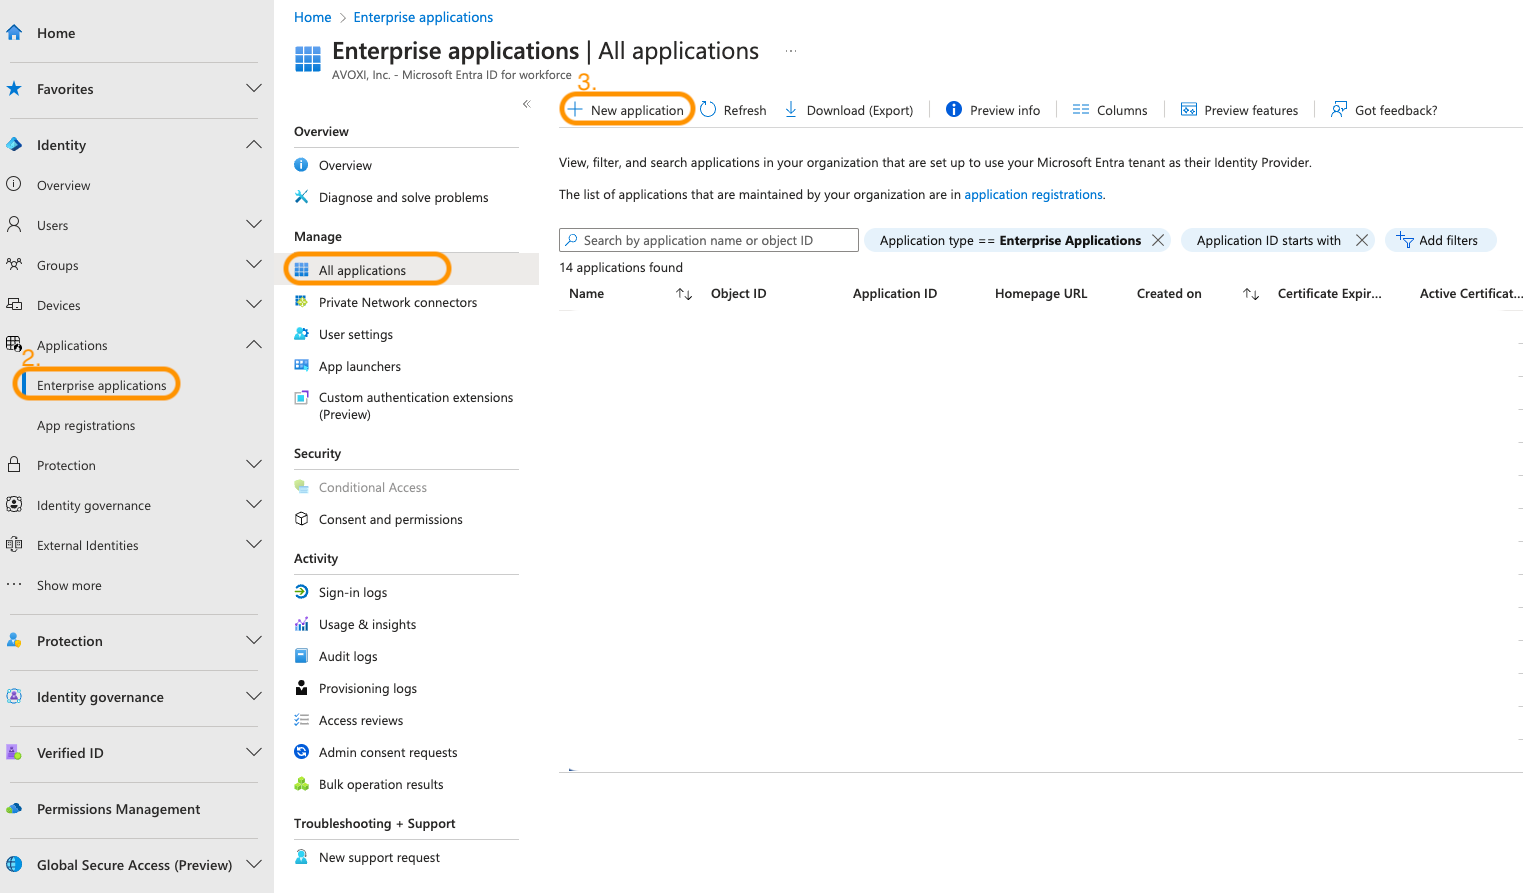
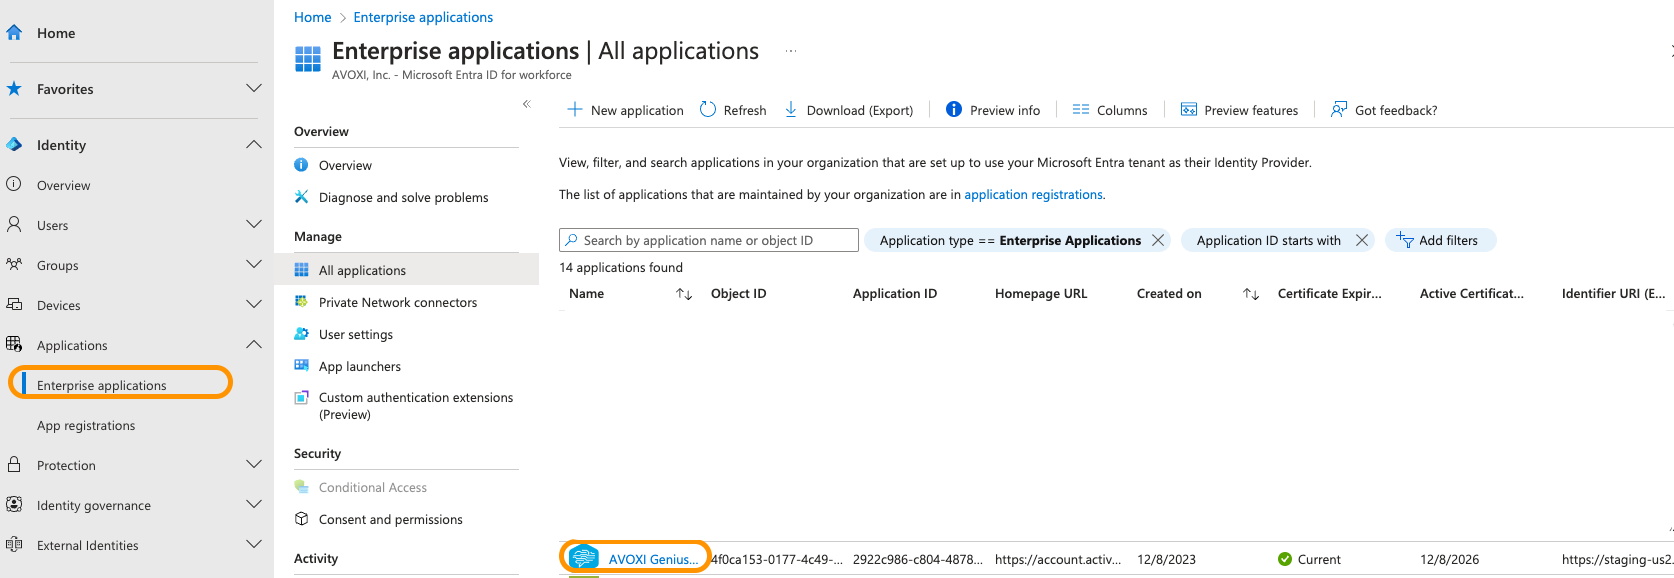
- Navigate to Applications → Enterprise applications
- Choose New application
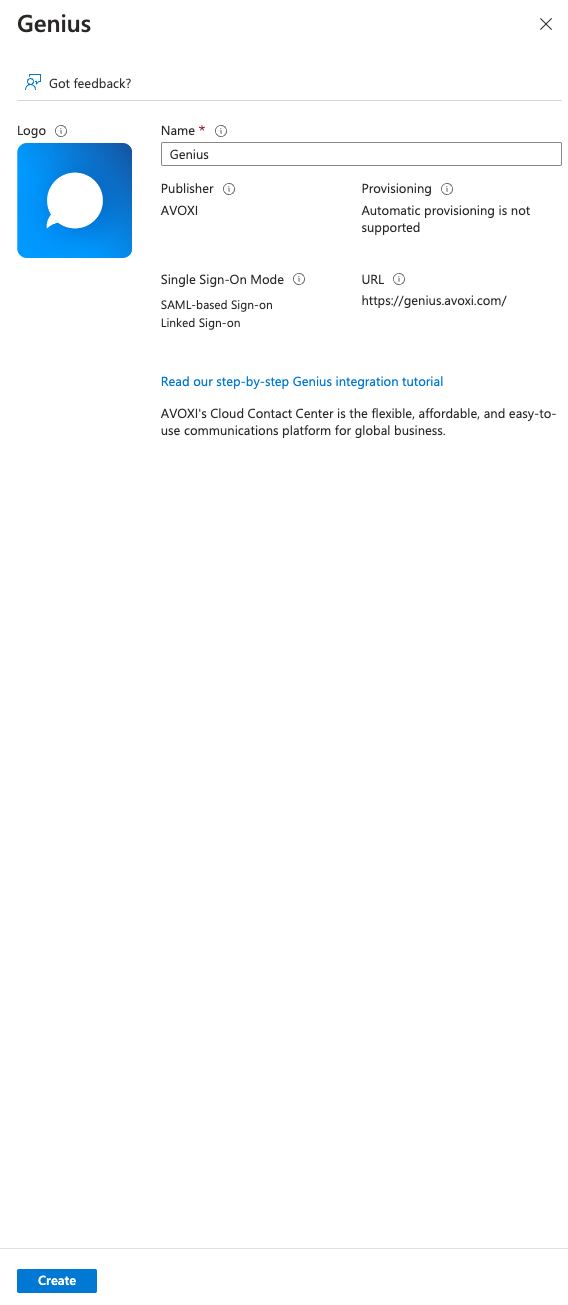
- Search for “Genius” or “AVOXI”
- Select the Genius application

- Click Create at the bottom of the right sidebar that pops out
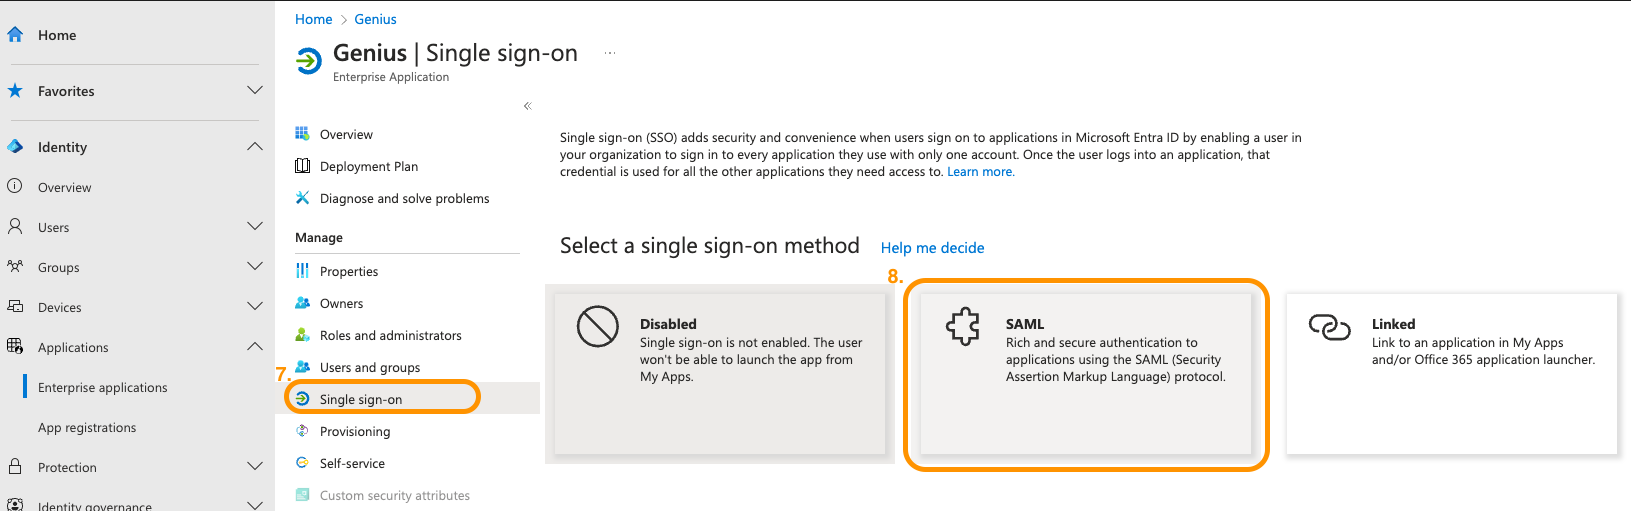
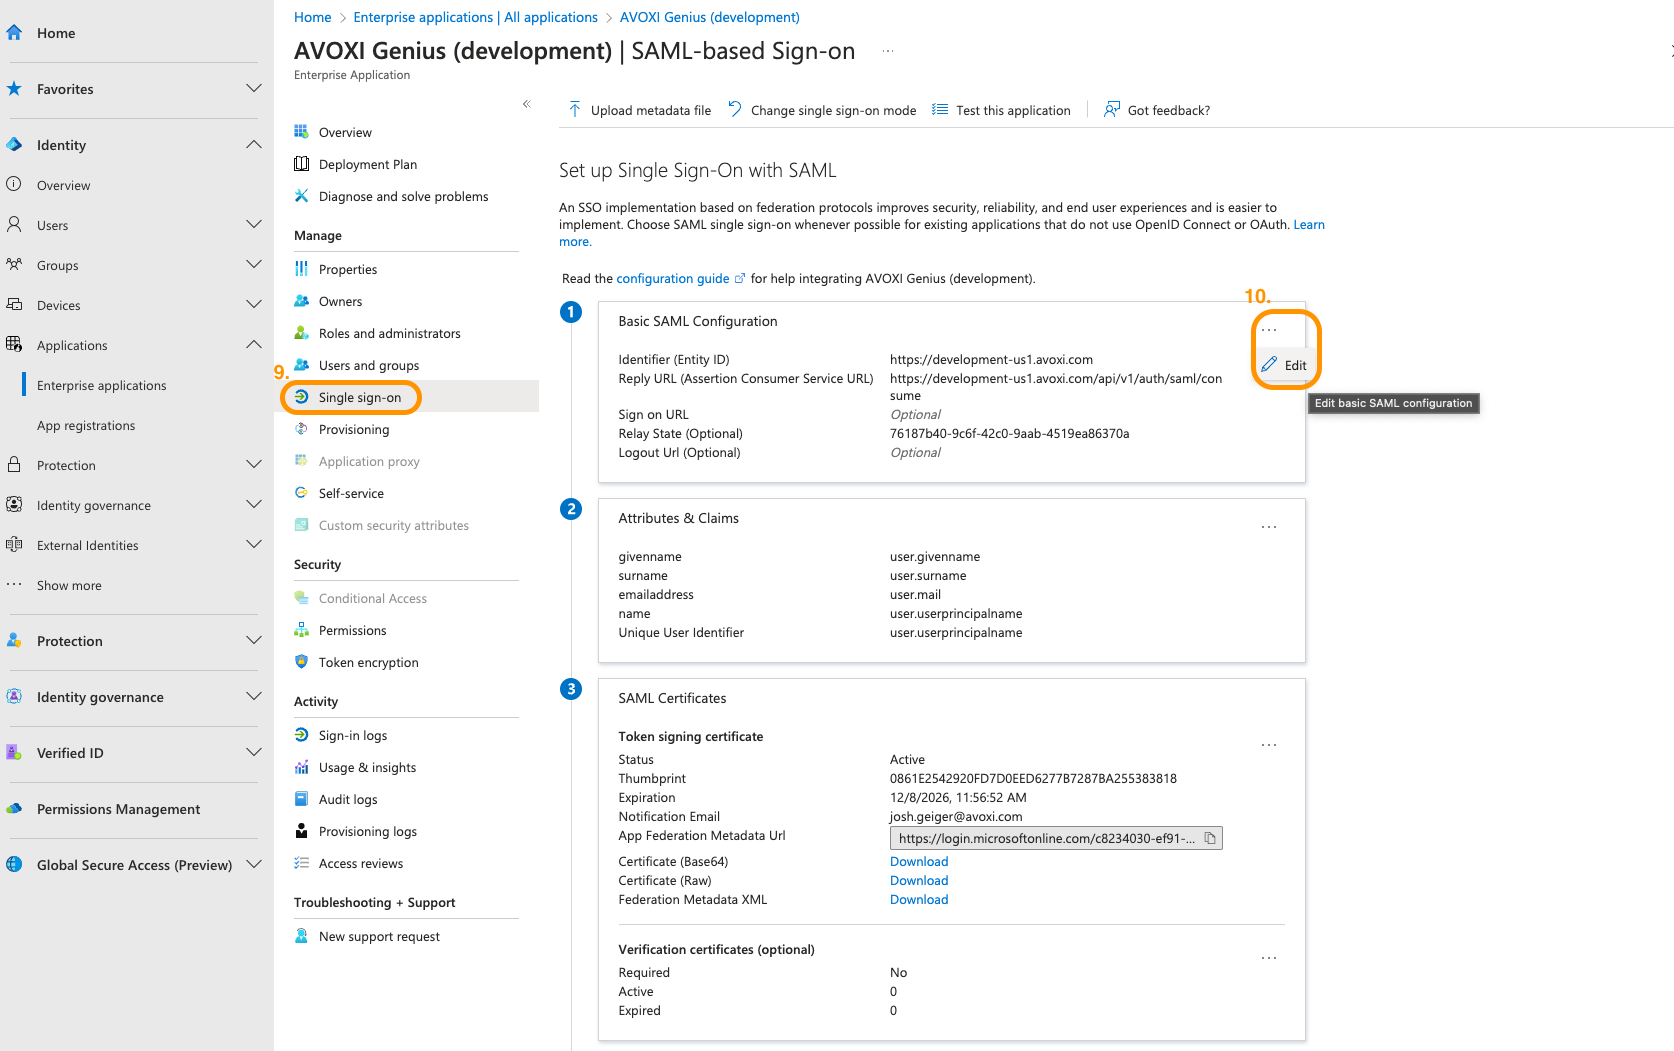
- Once Genius has been added to your applications, navigate to the Single sign-on screen
- Choose SAML Single Sign-On method
- In the Basic SAML Configuration option click on the ellipses and click Edit
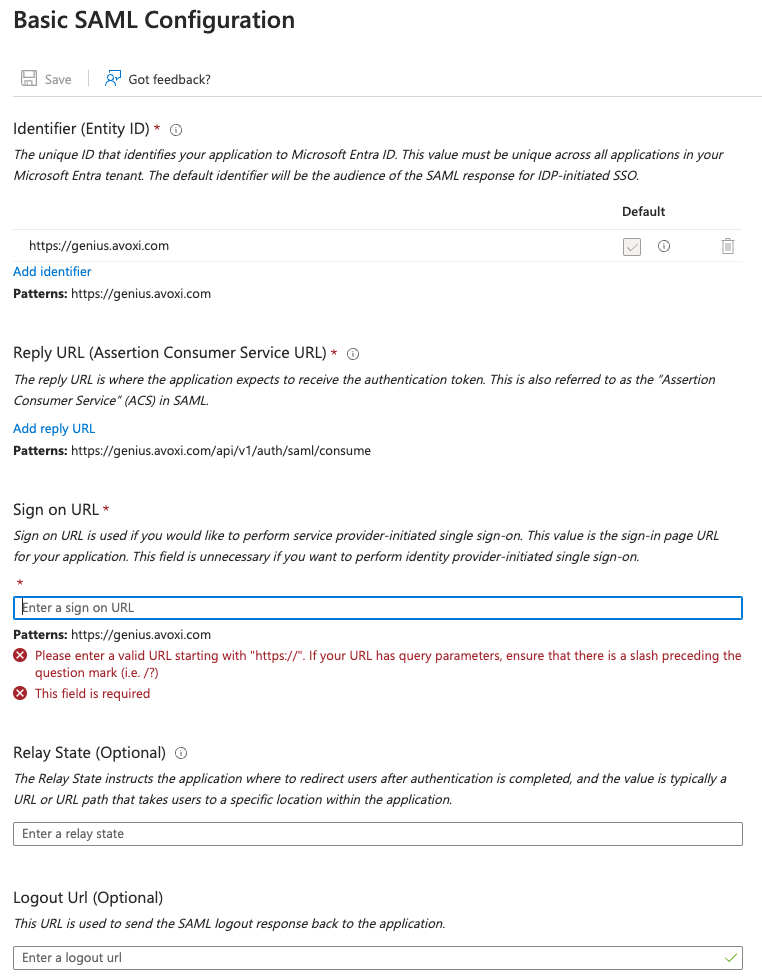
- Here you will need to fill out a couple of fields:
- Sign on URL - use https://genius.avoxi.com
- Click Save once you've entered that value and you can close the right sidebar (Basic SAML Configuration)
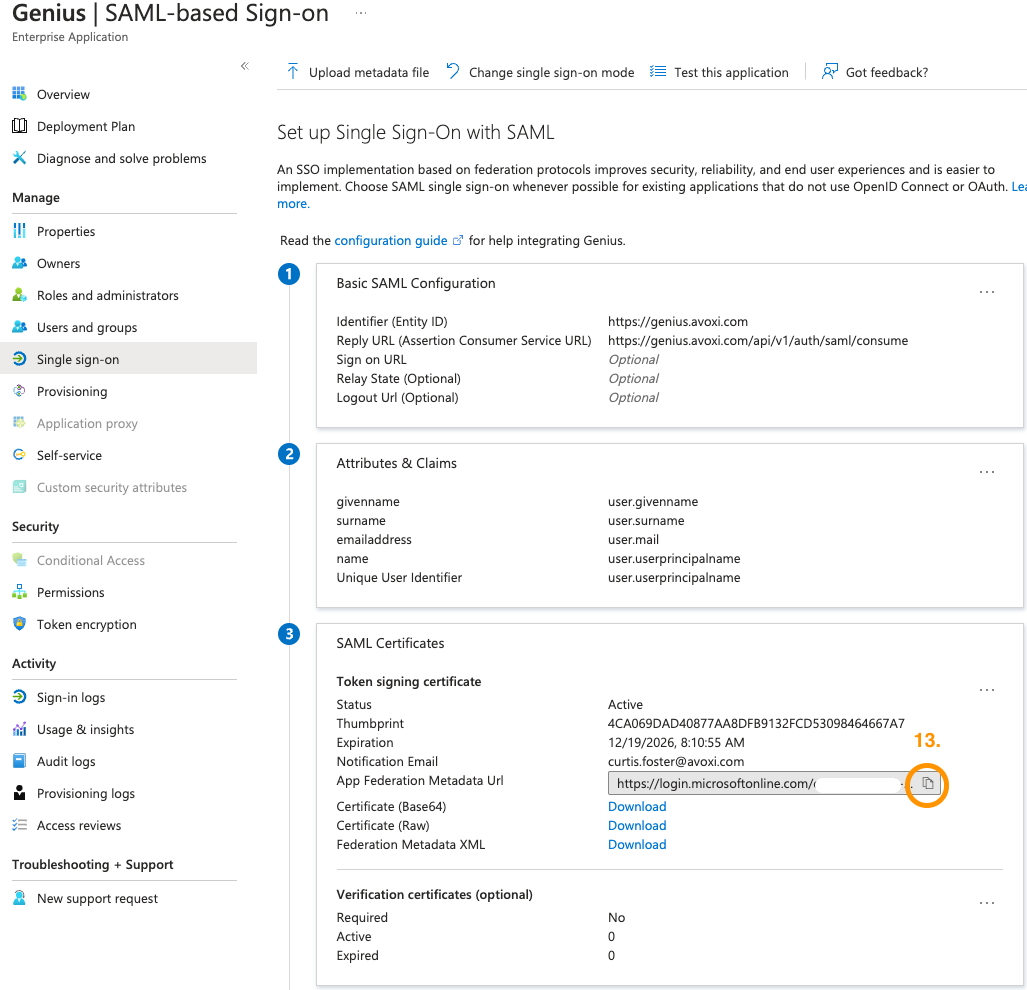
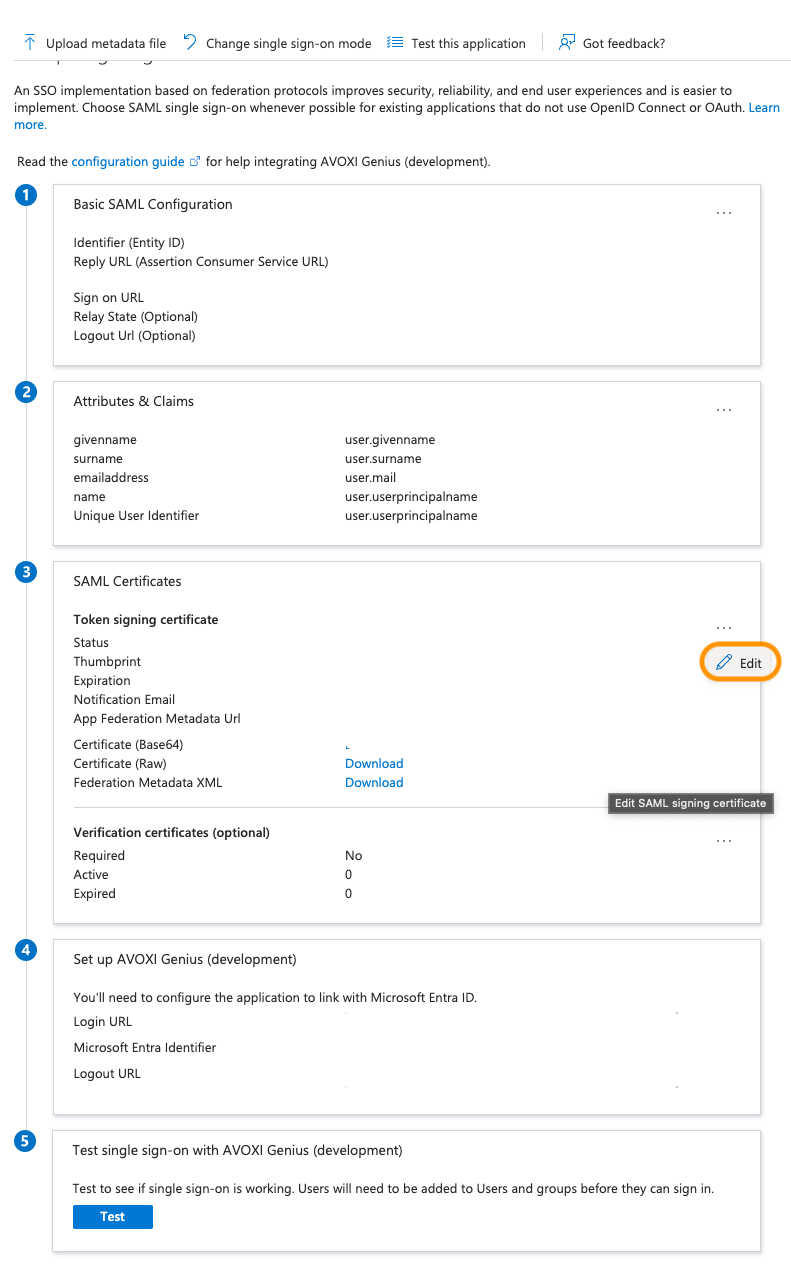
- Back on the Set up Single Sign-On with SAML page look in box 3 - SAML Certificates - and copy the App Federation Metadata URL
- Login to Genius and go to Home → Settings → Security Controls
- Enable SSO and choose Microsoft Entra ID from the dropdown
- Paste the App Federation Metadata URL in the Metadata URL field and click Save (will require you to enter your current Genius password)
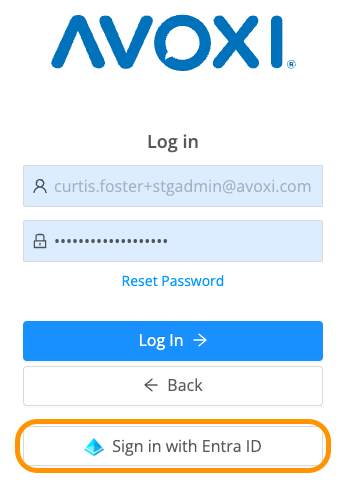
- SSO should now be configured, logout of Genius and log back in. Notice that after you enter your email there will be a new “Sign in with Entra ID” button that you can use to sign in through Entra ID SSO.
- Note: If you want to auto-redirect your users to Entra ID you can turn off Account Login from the Security Controls screen. This will disable logging in through ANY genius accounts and only allow login through Entra ID so BE CAREFUL before enabling as this will erase all current Genius passwords.
- [Optional] In Entra ID, navigate to the SAML Certificates section, click Edit, and in the Signing Option dropdown choose “Sign SAML response and assertion” for some additional security measures

Warning: When testing out SSO
Please make sure the account you're signing into in Genius on the first sign in screen where you enter your email is the same email as your user in Genius.
For example, if your email in Genius is firstname.lastname@company.com and you also have an admin account (that you might use to change org settings in Entra) firstname.admin@company.com you need to make sure you use firstname.lastname@company.com when you sign in to Genius. If you try to sign in to Genius through SSO with an account that does not have an email in Genius you will receive and error that the username was not recognized.
Set up in Entra through registering a new application
Create an app registration in Azure
In order to set up Microsoft Entra ID to support SAML 2.0 you will need to go through a few steps in Microsoft Azure to get everything enabled.
- Sign in to Microsoft Entra Admin Center
- Navigate to Applications → Enterprise applications
- Choose New application
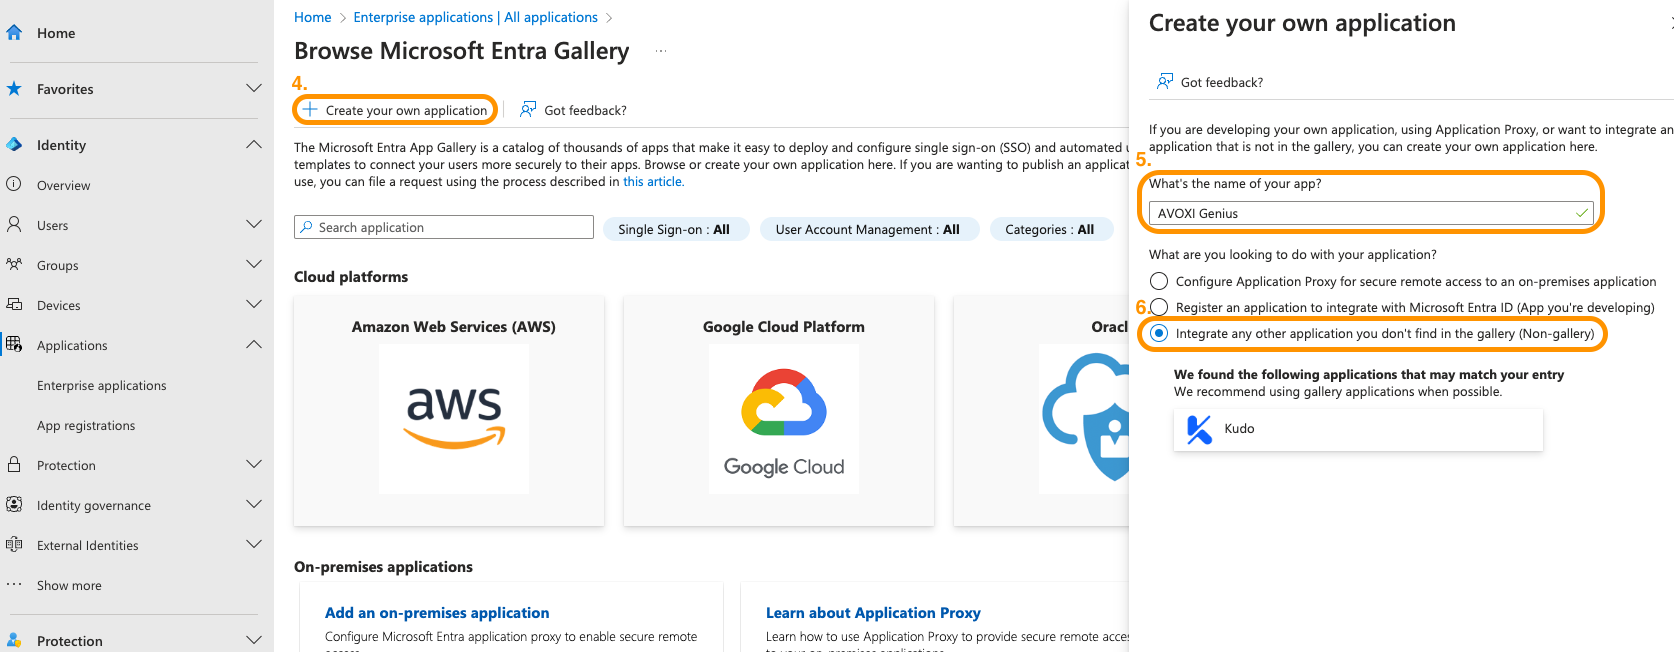
- Choose Create your own application
- Give the new application registration a name (may we suggest AVOXI Genius?)
- Choose “Integrate any other application you don'pt find in the gallery (Non-gallery)” option - choosing any other option here may not allow you to set up SAML-based SSO properly.
- Click Create at the bottom of the right sidebar once you've named the application and chosen an option
- Go back to the Enterprise applications screen and click on the AVOXI Genius application you just created
- After opening up your new Genius Enterprise application, go to the Single sign-on screen
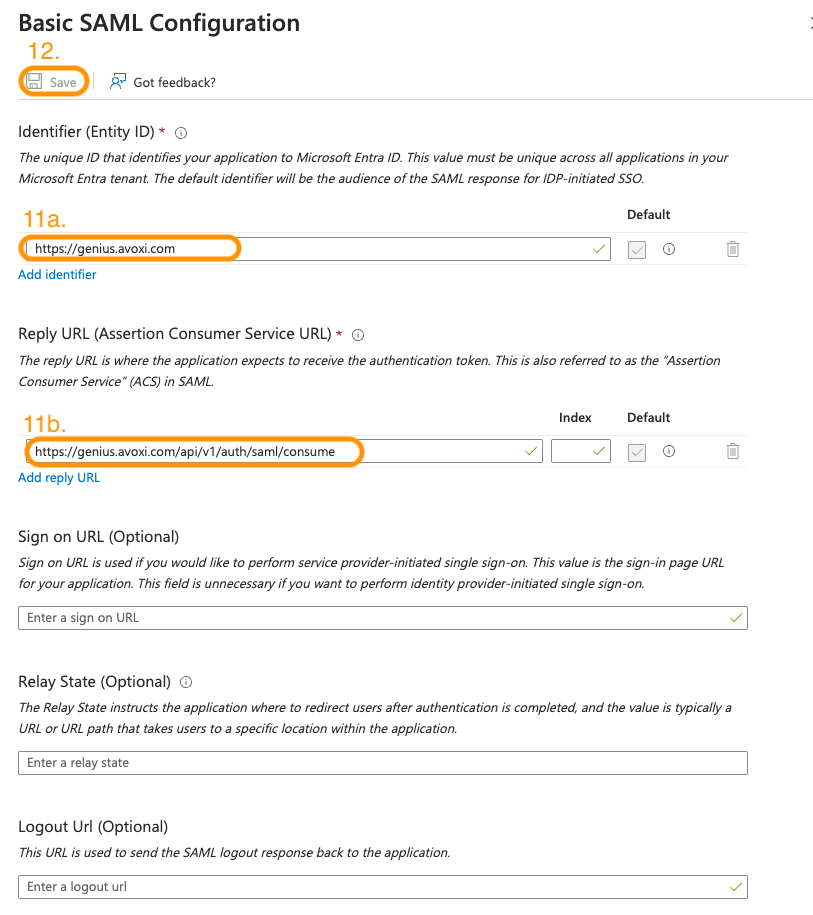
- In the Basic SAML Configuration option click on the ellipses and click Edit
- Here you will need to fill out a couple of fields:
- Identifier (Entity ID) - use https://genius.avoxi.com
- Reply URL (Assertion Consumer Service URL) - use https://genius.avoxi.com/api/v1/auth/saml/consume
- Click Save once you've entered those values and you can close the right sidebar (Basic SAML Configuration)
- Back on the Set up Single Sign-On with SAML page look in box 3 - SAML Certificates - and copy the App Federation Metadata URL
- Login to Genius and go to Home → Settings → Security Controls
- Enable SSO and choose Microsoft Entra ID from the dropdown
- Paste the App Federation Metadata URL in the Metadata URL field and click Save (will require you to enter your current Genius password)
- SSO should now be configured, logout of Genius and log back in. Notice that after you enter your email there will be a new “Sign in with Entra ID” button that you can use to sign in through Entra ID SSO.
- Note: If you want to auto-redirect your users to Entra ID you can turn off Account Login from the Security Controls screen. This will disable logging in through ANY genius accounts and only allow login through Entra ID so BE CAREFUL before enabling as this will erase all current Genius passwords.
- [Optional] In Entra ID, navigate to the SAML Certificates section, click Edit, and in the Signing Option dropdown choose “Sign SAML response and assertion” for some additional security measures
Warning: When testing out SSO
Please make sure the account you're signing into in Genius on the first sign in screen where you enter your email is the same email as your user in Genius.
For example, if your email in Genius is firstname.lastname@company.com and you also have an admin account (that you might use to change org settings in Entra) firstname.admin@company.com you need to make sure you use firstname.lastname@company.com when you sign in to Genius. If you try to sign in to Genius through SSO with an account that does not have an email in Genius you will receive and error that the username was not recognized.