Step 1 - Navigate there and Explore
Go to Flow Builder tab available in the left navigation panel
Explore the canvas, widgets in the widget library, mini map , save/publish button.
Read more here - Overview, Flow Builder Terminology , Using Flow builder
Step 2 - Build a call flow
-
Click on the add button under the Flow start widget and choose IVR widget from the widget library.
- Click on the IVR widget and use the IVR config panel available on the right hand side.
- Give your IVR a name and choose the appropriate Menu prompt in the details section.
- Go to the "User Input" tab in the IVR config panel and select 1,2 and 3 key presses. Add Wait time for user Input.
-
Select target destination for IVR key press and timeout
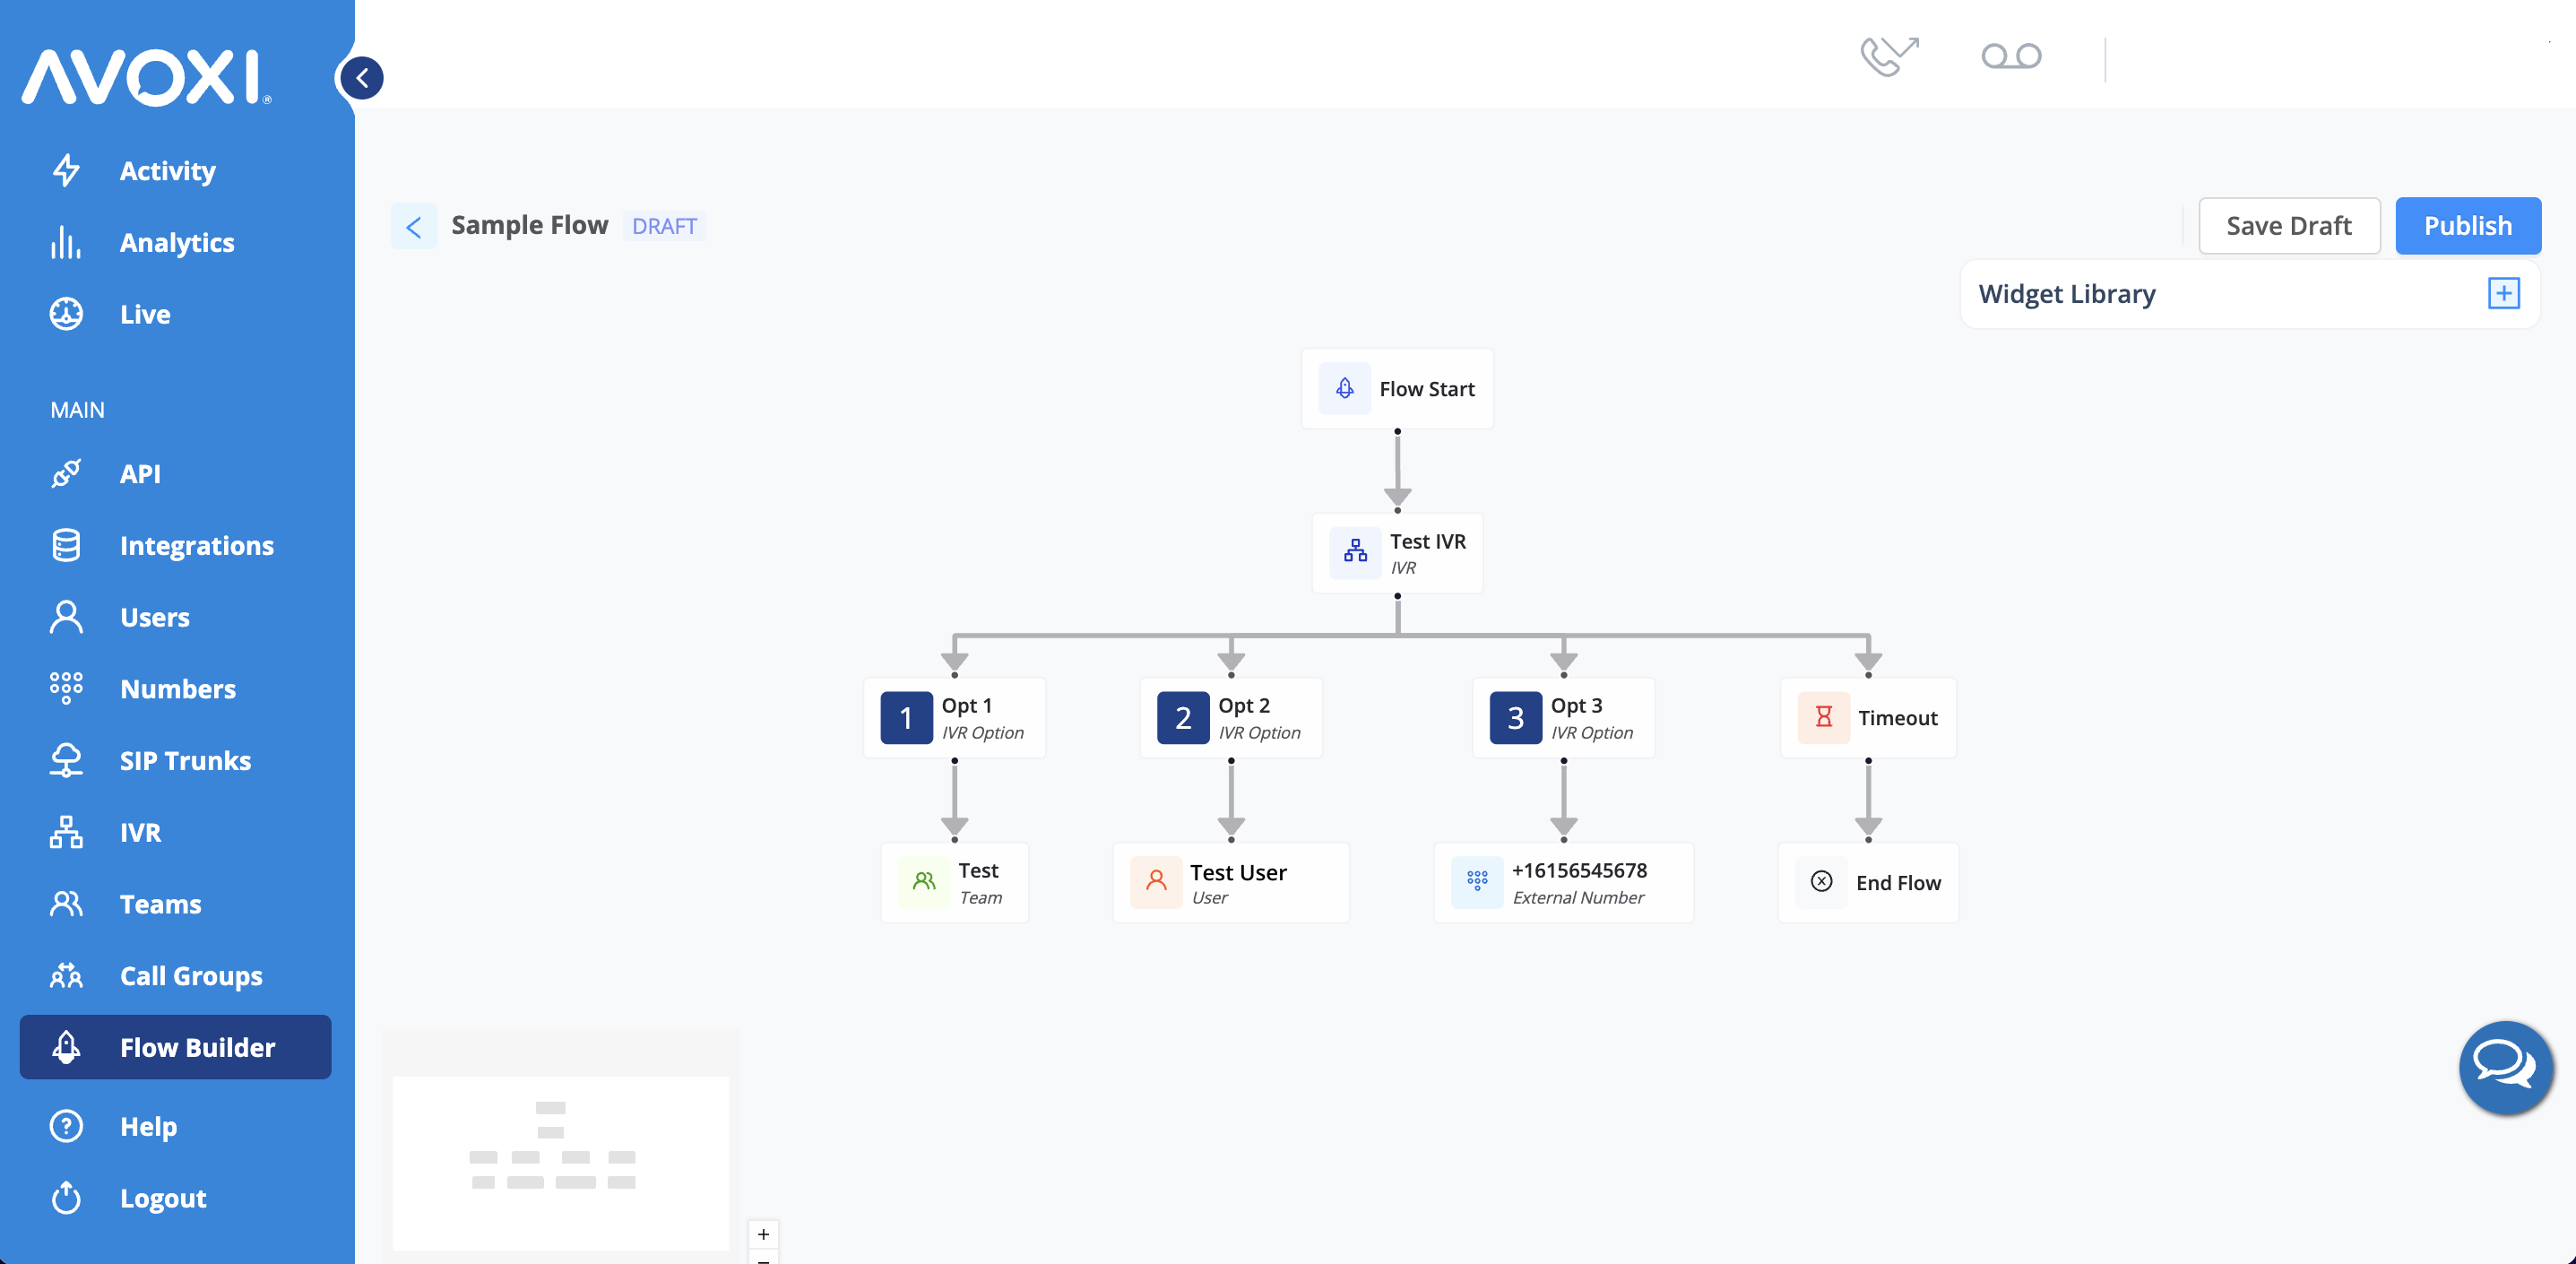
Click on add icon under IVR option 1 and add Team widget
Click on add icon under IVR option 2 and add User widget
Click on add icon under IVR option 3 and add External Number widget
Click on add icon under Timeout and add End Flow widget
-
Choose appropriate values for Target destinations
- Choose Team, user available with your organization and add a desired external number.
Detailed guide on all the available widgets - Widget Library
Step 3 - Check if your call flow looks similar to this

Step 4 - Change flow name and Save your call flow
Change the name of your flow to “Sample Flow”.Click on the name, edit the name and press the Enter Key to reflect changes
Click on the Save Draft button available on the top right.You would see a floating banner with message “Successfully saved flow”
Step 5 - Publish your flow
Click on the Publish button available on the top right. You would see a floating banner with message “Successfully published flow”
Step 6 - Forward numbers to flow
Go to a number, Forwarding tab. Add a new call forwarding rule. In the “Forward calls to” field choose Flow and appropriate value from the dropdown.
Make a test call and check if flow works as expected.
