The Queue Callback feature is only available to Enterprise License holders, use our easy to follow guide to upgrade. The queue management feature gives Admins/Supervisors the freedom to activate or deactivate the feature based on agent availability and call volume. For a full description of how Queue Callback functions, please click here.
Enabling/Disabling Queue Callback
Use the below step-by-step guide activate the Queue Callback feature:
- Login in to your AVOXI account as an Admin/Supervisor
- Click the "Teams" section located on the left-hand navigation bar (1)
- Under the "Team Name" column select the "Team" for which you wish to activate the Queue Callback feature (2)
-
AVOXI Tip: Queue Callback is configured at a team level, not an organization level. This gives Admins/Supervisors the ability to activate the callback functionality on select teams. We recommend you set your Ring Strategies to Round Robin, also view our team configuration guide.

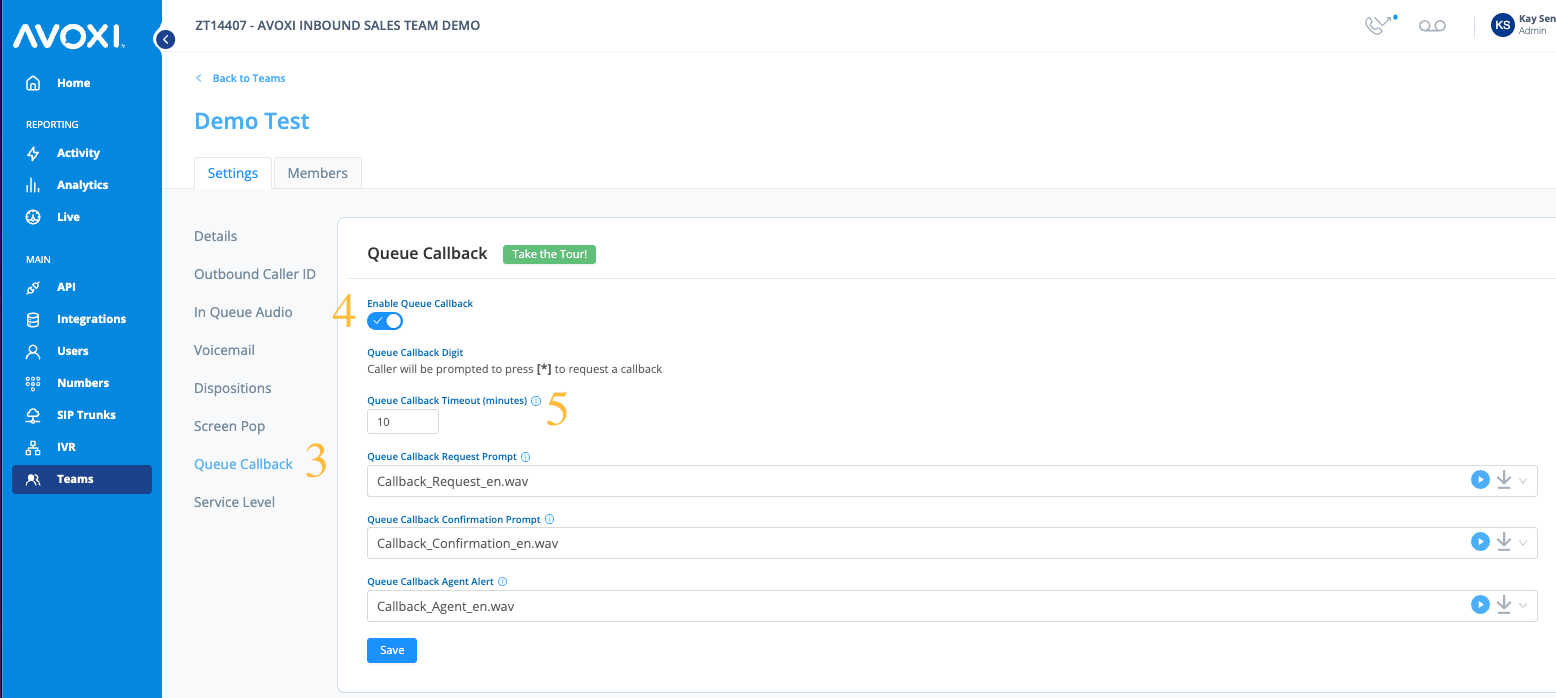
- On the "Settings" page select the "Queue Callback" feature tab (3)
- If you are currently a Contact License holder, you can use the upgrade link and user guide to upgrade now.
- Use the toggle switch to enable/disable Queue Callback on your selected "Team" (4)
- AVOXI Tip: The toggle shows grey when disabled and blue when enabled.
- AVOXI Tip: Existing waiting calls will not be affected if the callback feature is disabled while there are callers in the queue waiting for a callback.
Setting Queue Callback Timeout
This is the timeout setting predicating the maximum time that a callback call waits in the queue before being counted as abandoned. The minimum value is 1 minute and the maximum value is 240 minutes. (5)

AVOXI Tip: Administrators have the ability to configure custom Queue Callback prompts.
