Multifactor Authentication (MFA) provides an extra layer of security to your account. It helps to protect your user’s accounts from being accessed by the wrong person. With MFA enabled users must enter their username and password and verify their identity with a verification code.
Enable MFA for your organization
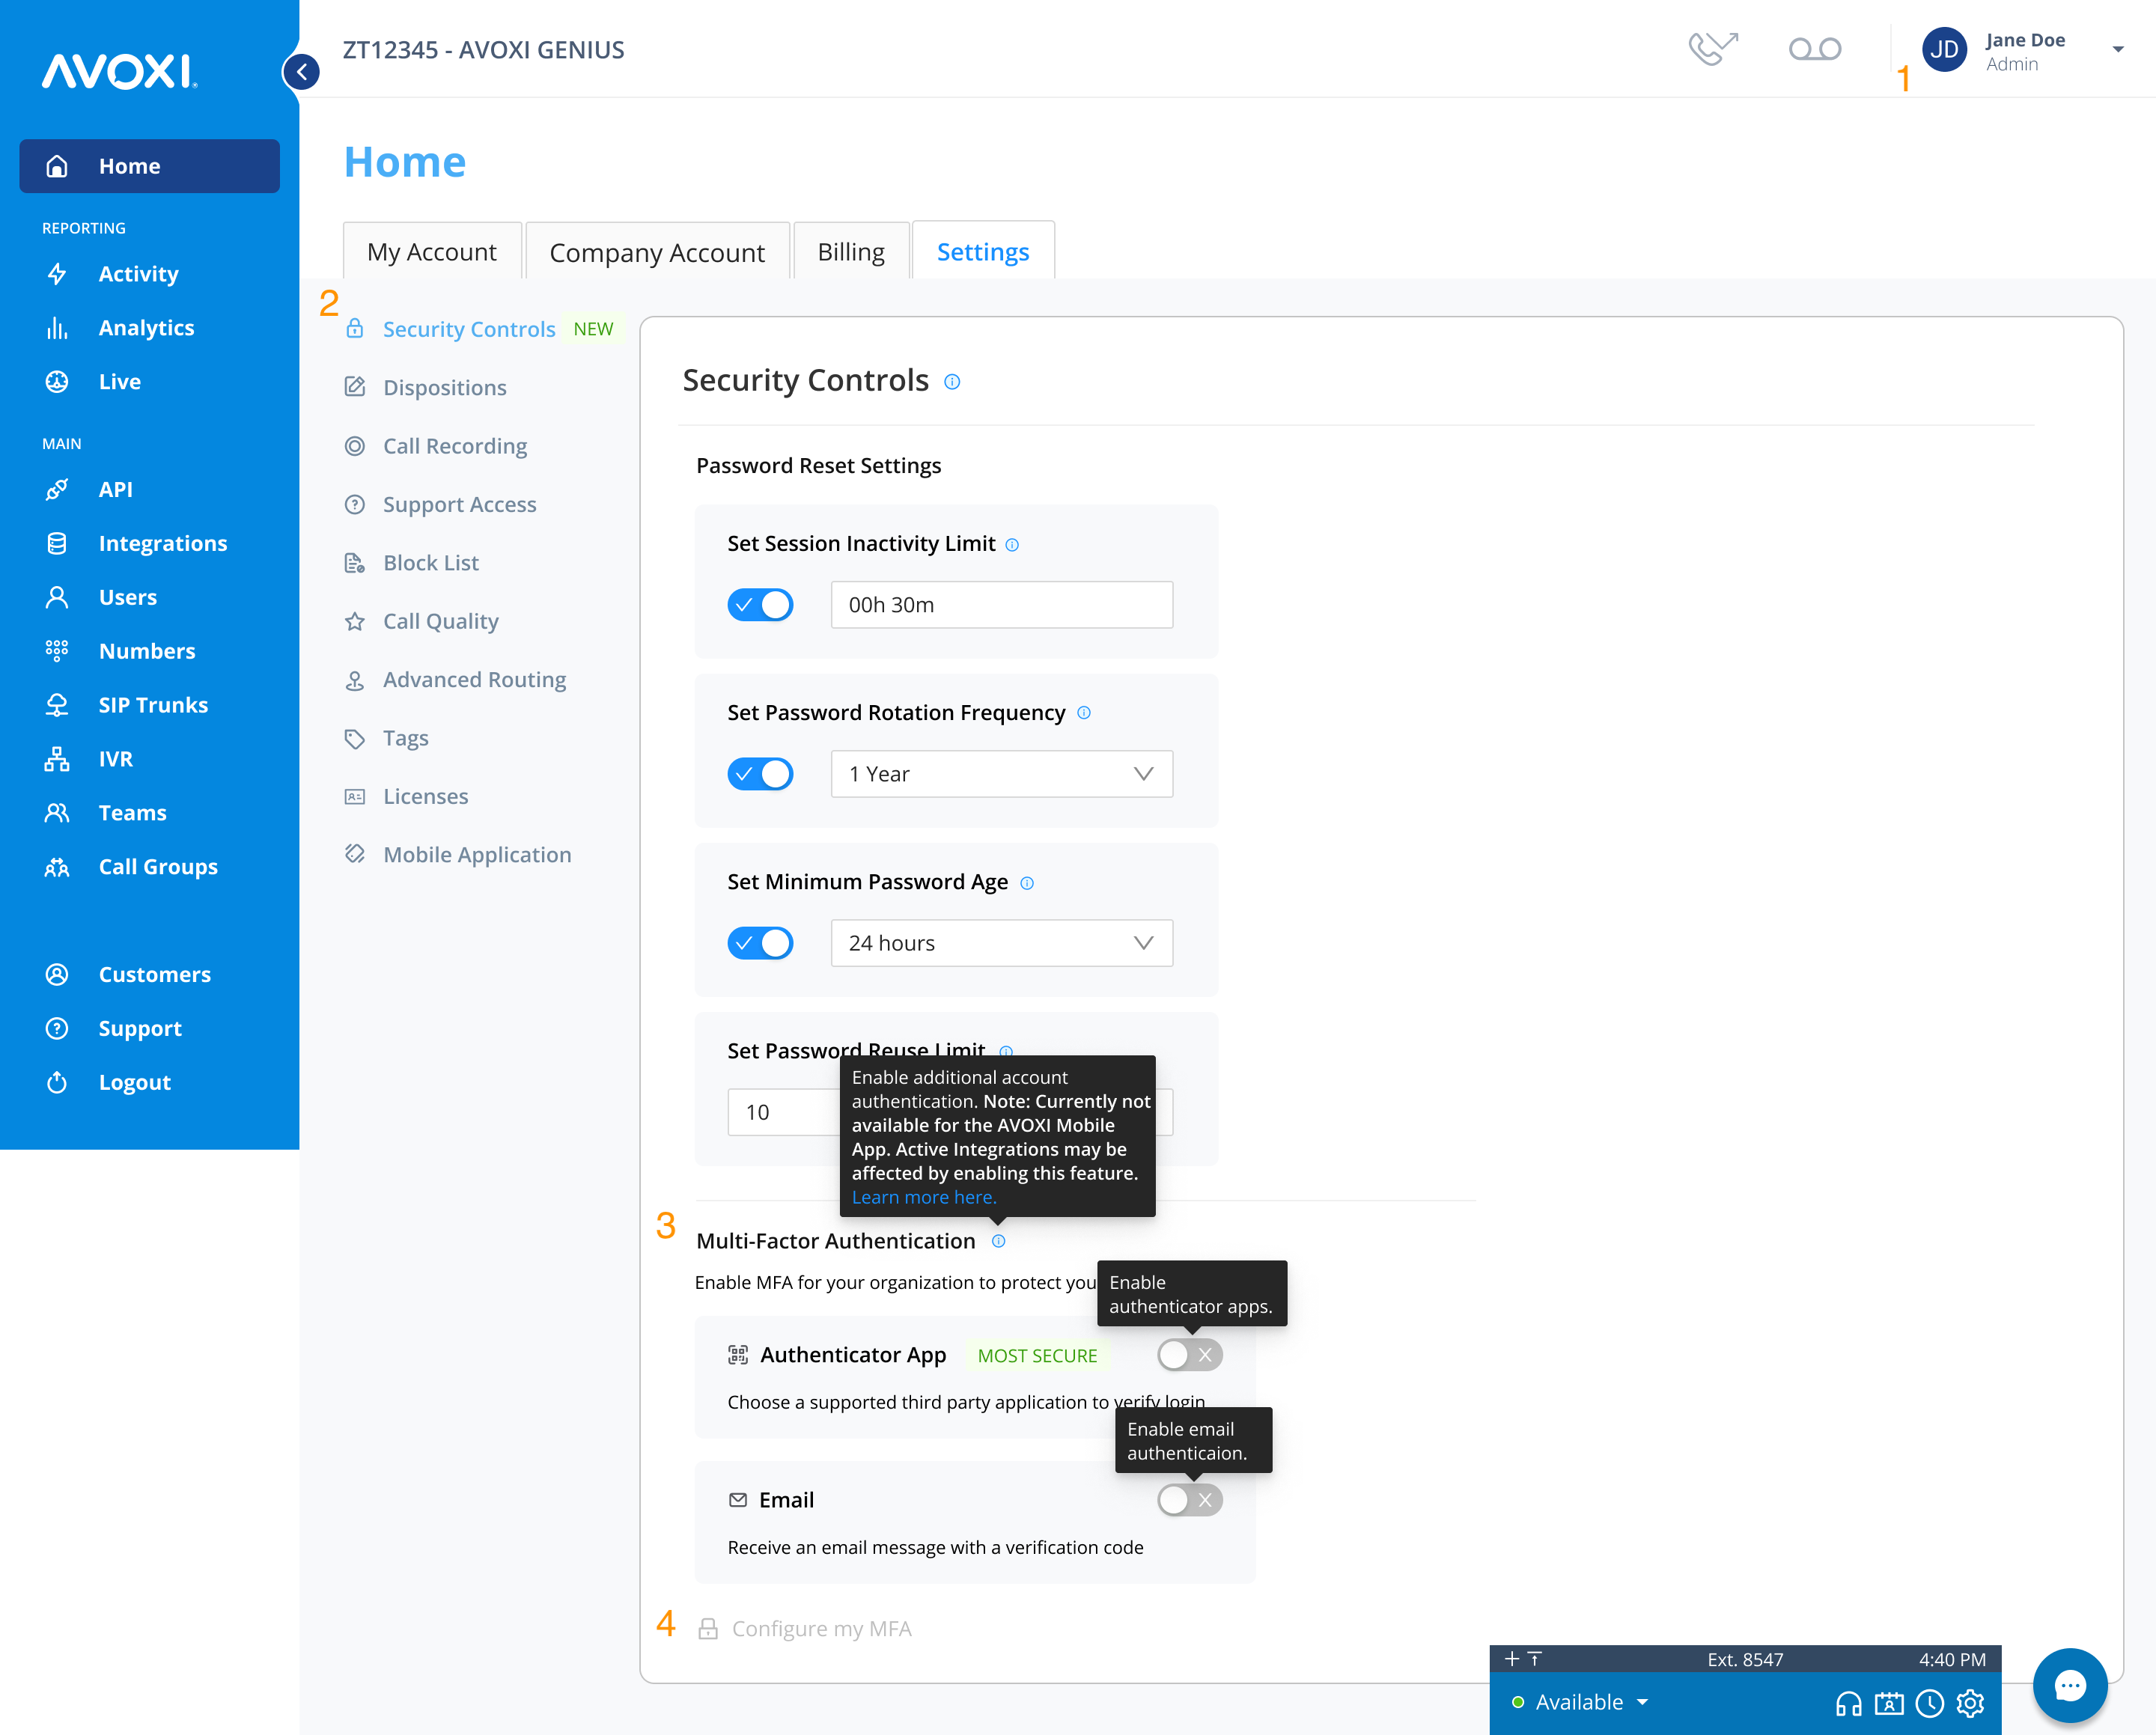
- Navigate to My Account > Company Settings
- Navigate to Security Controls in the left navigation
- Toggle on the MFA authentication method(s)
- This will expose the MFA setting for the users in your organization
- Email - Users can register to receive their verification code via their email address on file
- Authenticator App - Users can register to receive their verification code via a 3rd verification app
- Ex: Duo, Authy, Okta Verify, Google Authenticator, Microsoft Authenticator, and other TOTP-based authentication apps
- Select ‘Configure my MFA’ to set up MFA for your personal user profile

Disable MFA for your organization
- Navigate to My Account > Company Settings
- Navigate to Security Controls in the left navigation
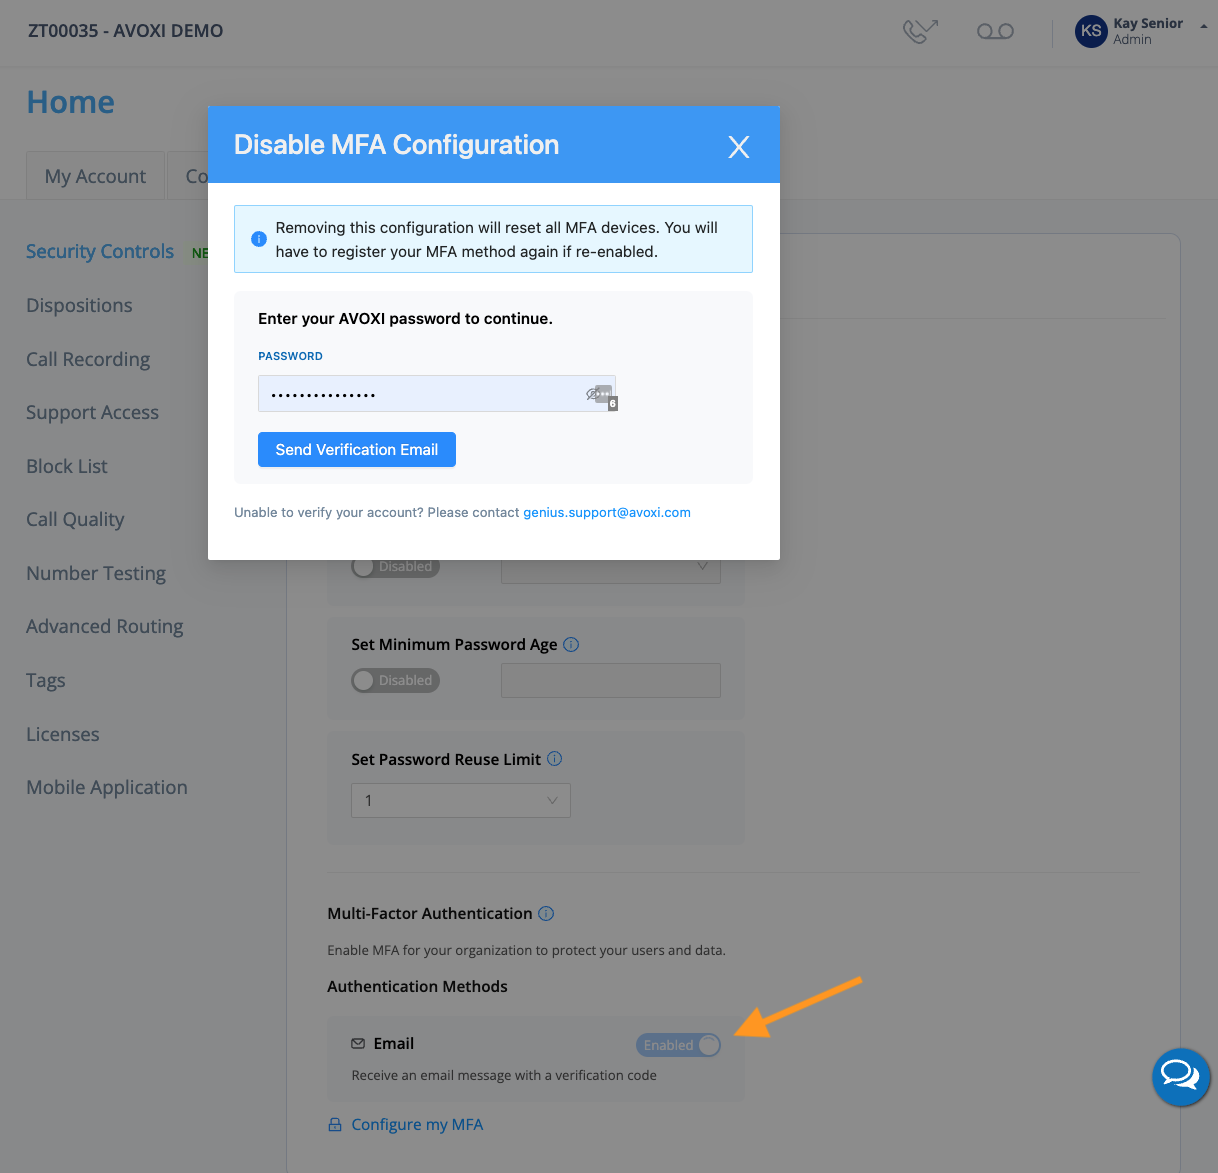
- Enter your credentials to edit your MFA settings
- Complete the MFA verification process
- Toggle off the MFA setting
- Select or deselect ‘Forget all devices’
- This will unregister all email addresses and devices that were previously configured with MFA.
- Confirm
- Users will no longer see the MFA setting in their accounts.
- Users will not be prompted to enter a verification code to log in.

View MFA Users
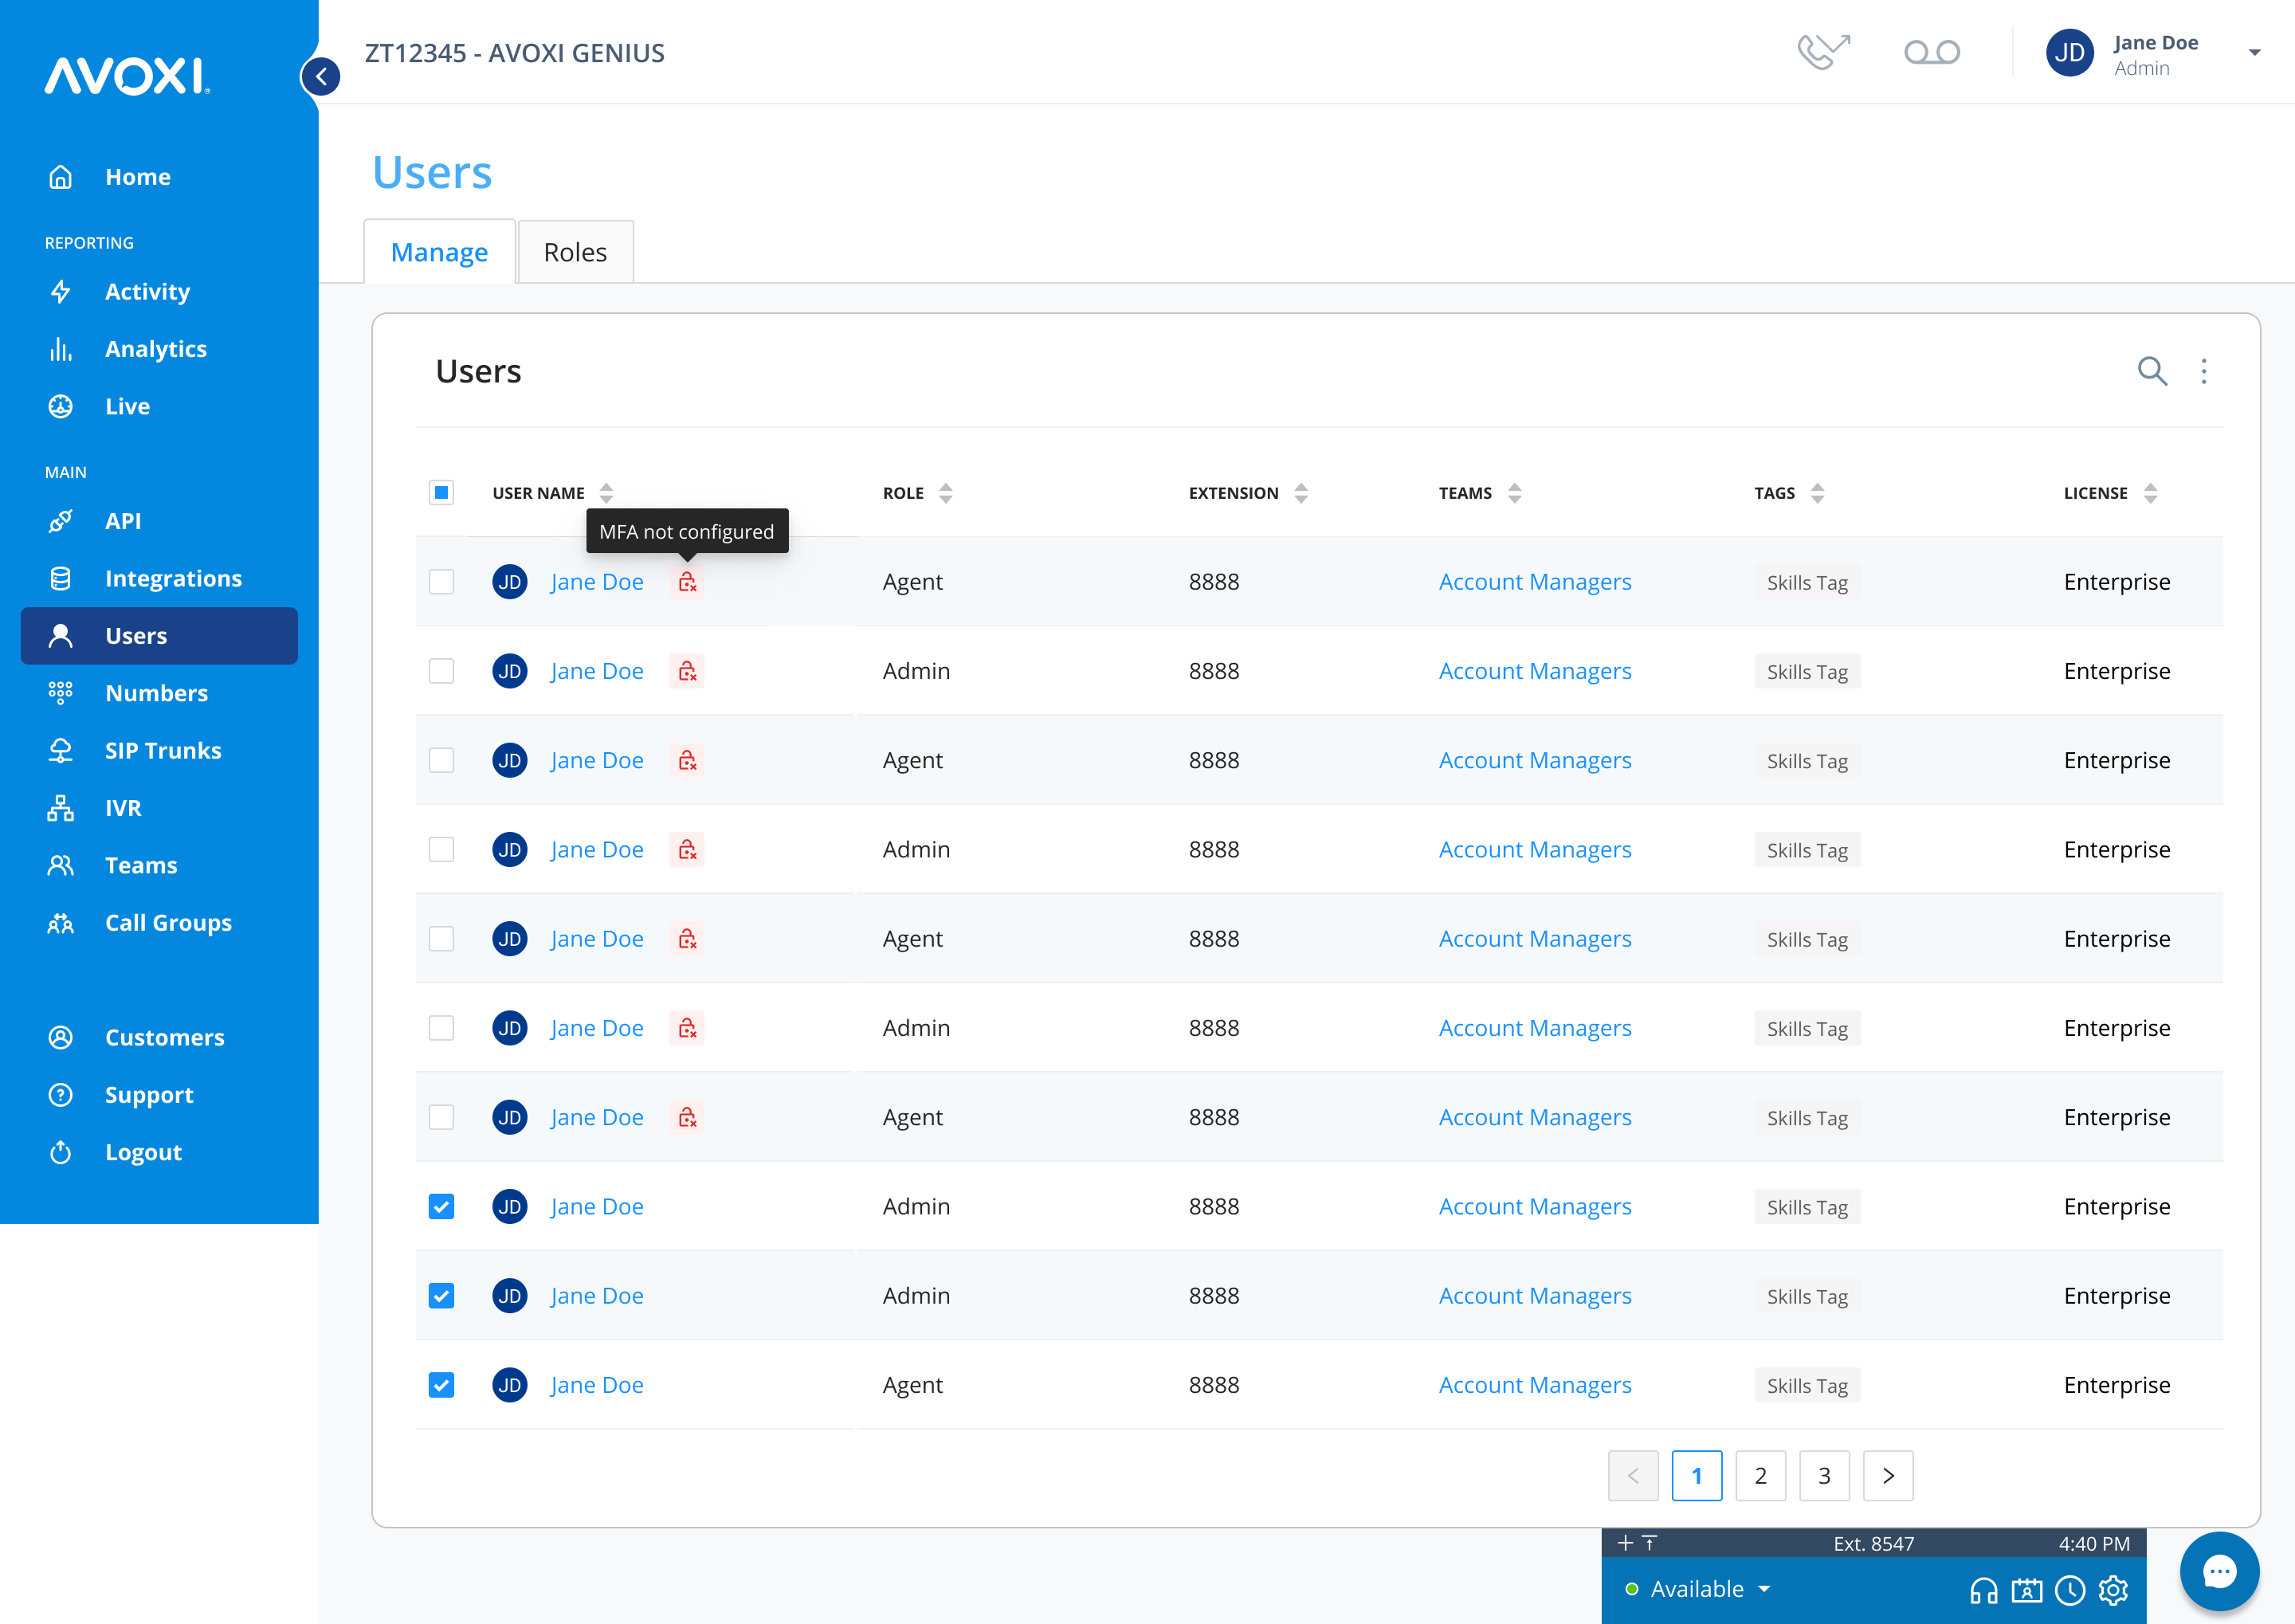
Once MFA has been enabled, administrators can view which users have MFA enabled and which do not.
- Navigate to Users in the left navigation menu
- An icon will appear next to the users who have NOT configured their MFA
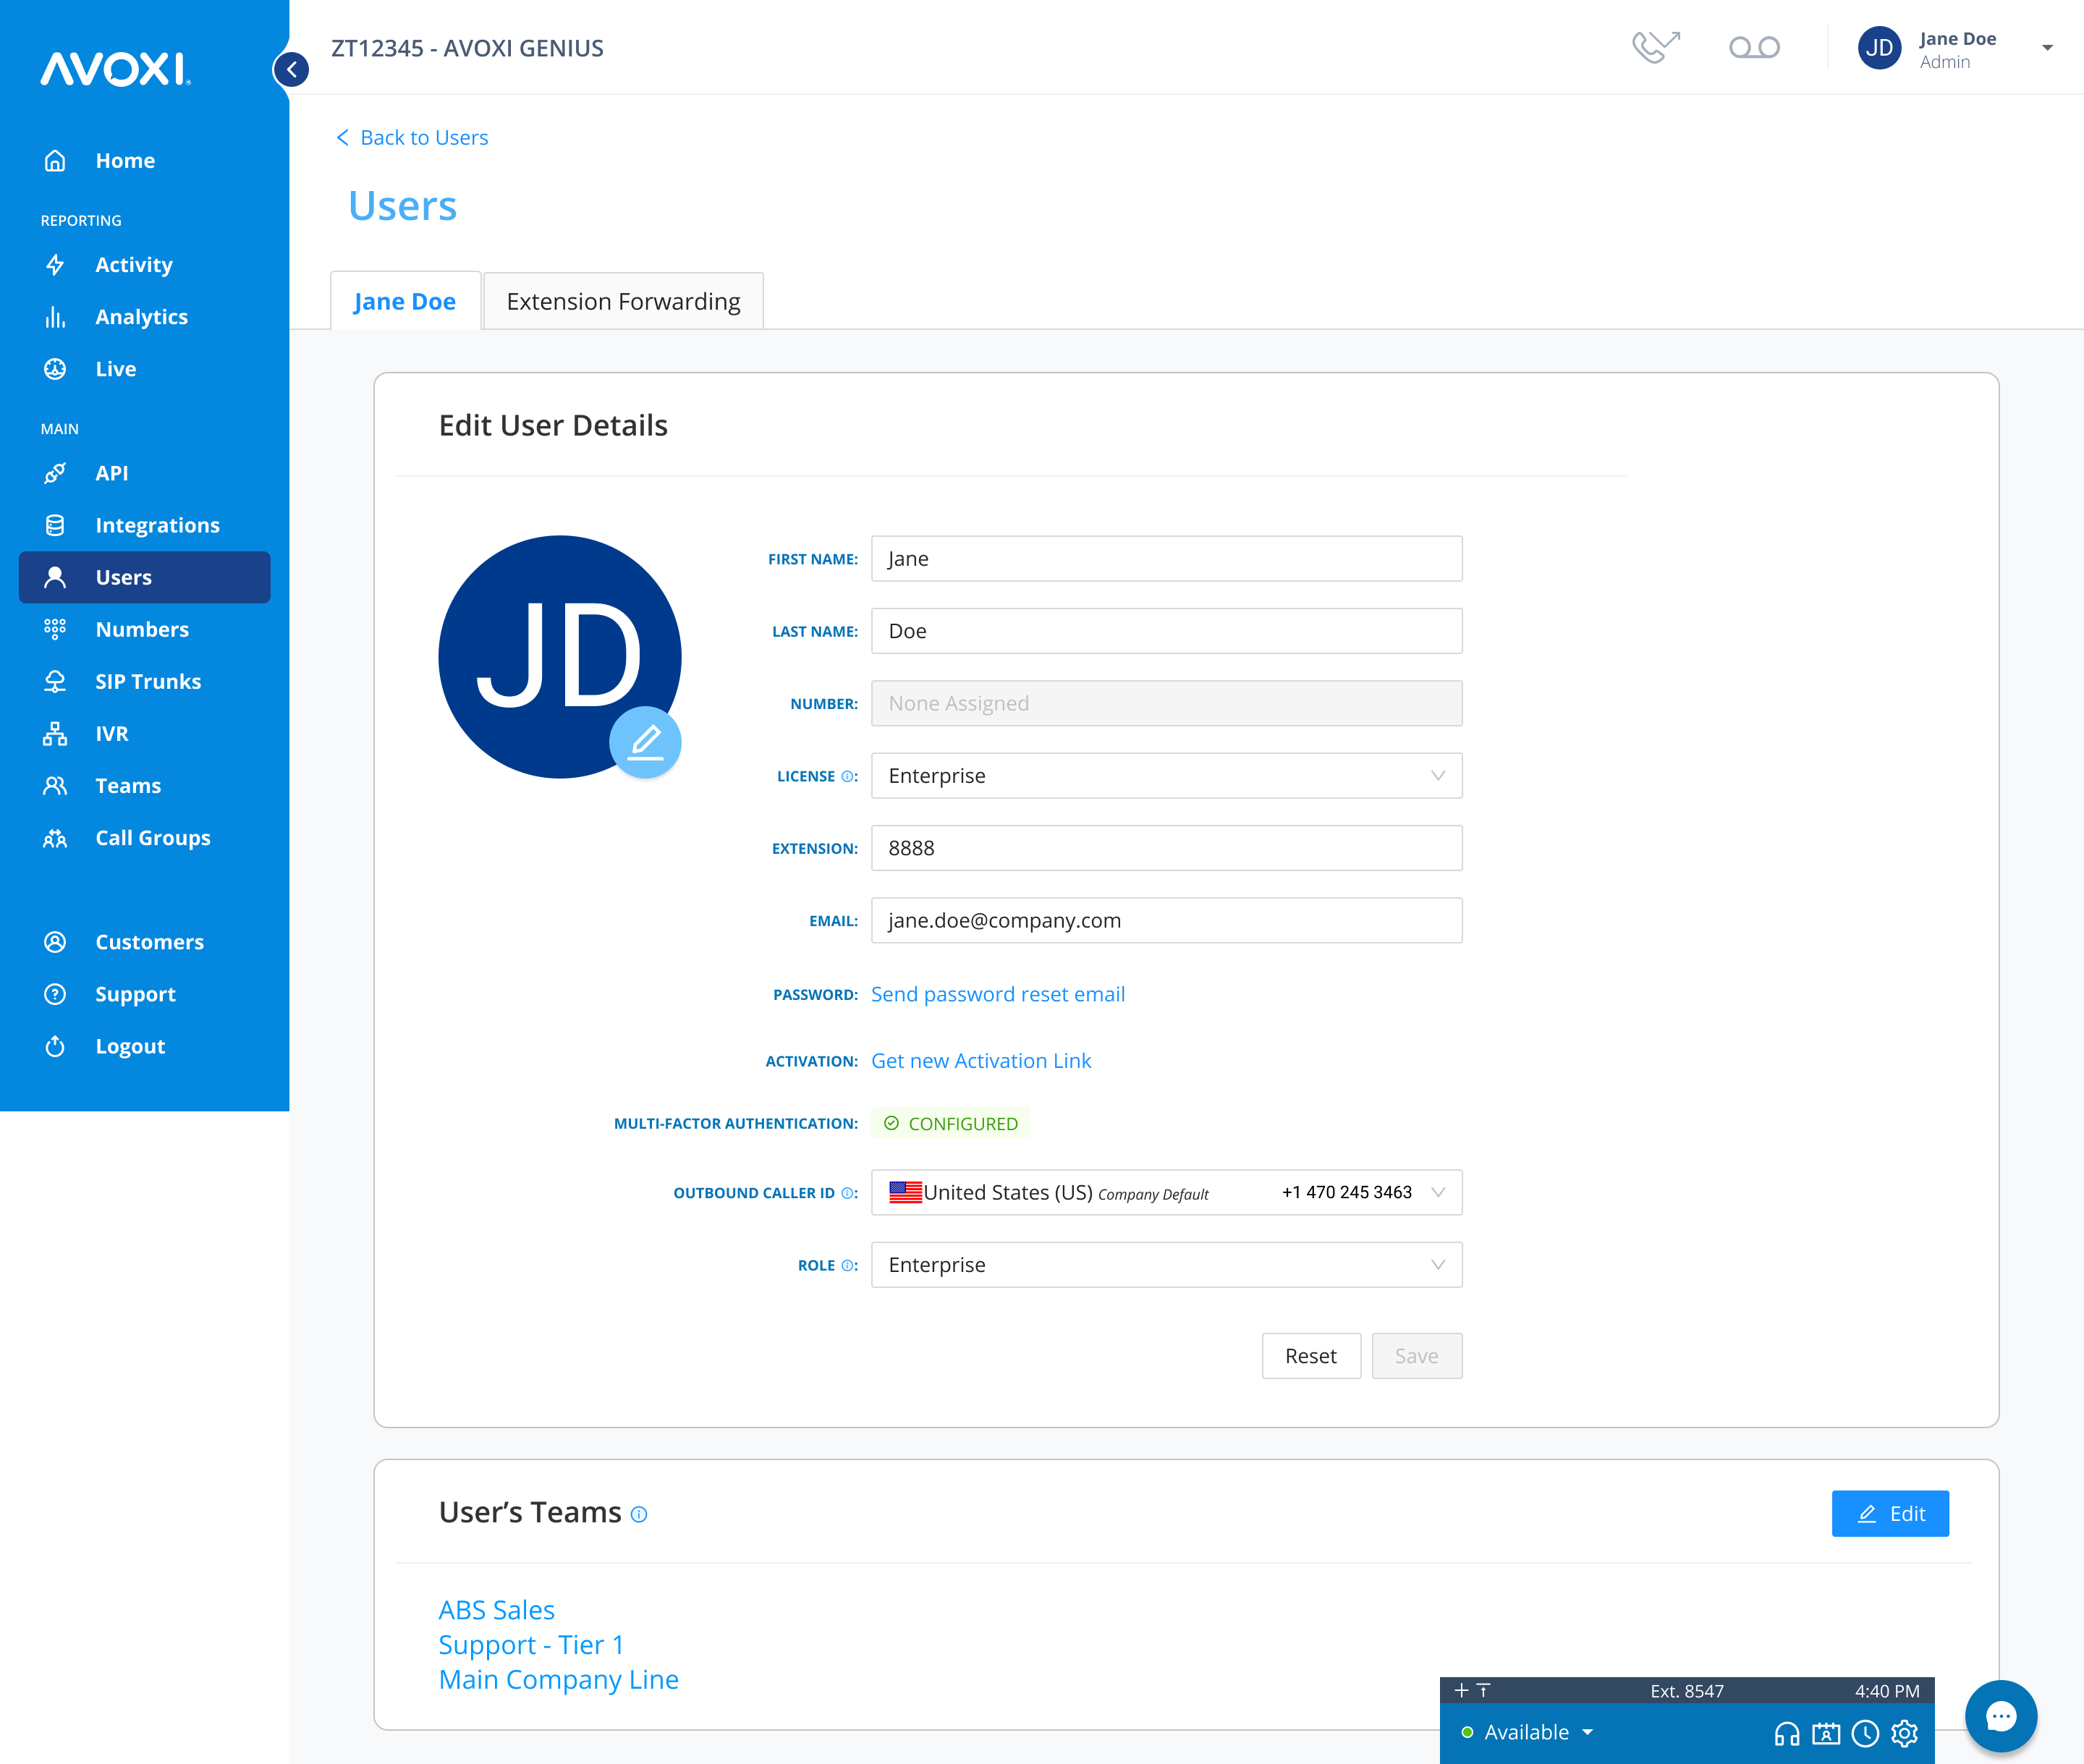
- Select an individual user to view their user profile


