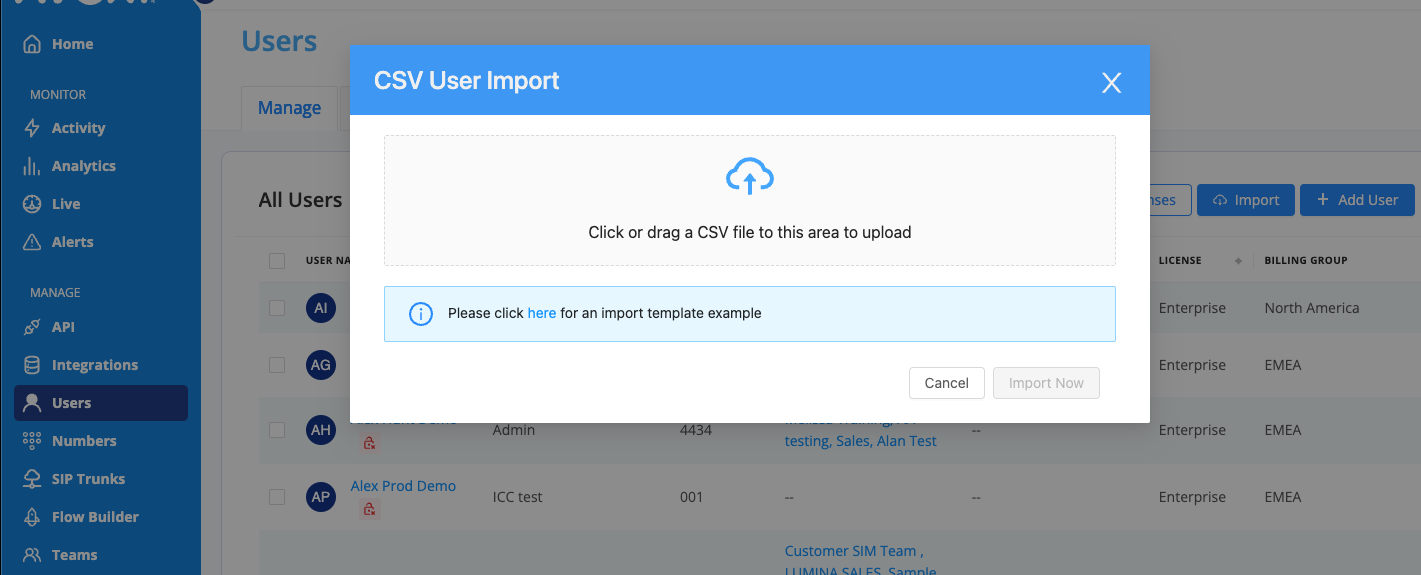
Administrators can now import bulk contacts using the CSV import button. Use the downloadable template to build a list of users or employ business tools like Microsoft, Google, CRMs, and helpdesk. Once imported, AVOXI will create users with a predetermined license, extension number, and role. This time-saving feature is easy to use and helps ensure the efficient management of new user accounts.
Use the below step-by-step guides to get started:
Importing users using a CSV file
CSV files (comma-separated values) are plain-text files that make it easier to index and organize large amounts of data/contacts, which can then be easily imported into a spreadsheet. Administrators can use a CSV file to export contact/user information from any CRM tool and upload it within their AVOXI contact center platform.
Creating a CSV Import File
Below is the template that will be used to bulk import users into your AVOXI platform:
First Name |
Last Name |
License |
Extension |
Email Address |
Role |
Data Center |
Bob |
Hawkins |
Enterprise |
1000 |
bob@company.com |
Agent |
US |
Andrew |
Davis |
Enterprise |
1001 |
drew@company.com |
Supervisor |
BR |
Barbara |
Kingston |
Enterprise |
1002 |
barb@company.com |
Admin |
UK |
- First Name: First name of the user.
- Last Name: Last name of the user.
- License: License type for the user. There are only 3 options: Contact, Enterprise, and Unassigned. Note: Please only assign licenses that are available for assignment. For example, if a user assigns an Enterprise license when none are available, there will be an error.
- Extension: The extension number of the user. Extensions must be unique.
- Email: The business email of the user.
- Role: The role of the user. The accepted roles are Admin, Supervisor, Agent, Billing Admin, Inbound Agent, Limited Agent, Supervisor, and any custom roles previously created.
- Data Center: A two letter code for the data center the user will be assigned. Example: 'US' for the US East data center. Access the list of data centers here.
User Import Template
To download the template in excel format, please use User Import Template.
A reminder that users downloading this template must save the excel file as a CSV format to import into your AVOXI platform. The steps are as follows:
- Open the Import file. This can be done through spreadsheet software such as Microsoft Excel or Google Sheets but can also be done in TextEdit (Mac) or Notepad (Windows).
- Select File.
- Click Save As.
- Rename the file if you prefer, then select. CSV (Comma delimited.)
- Click Save.
Importing New Users
- Log in as an Administrator.
- Select the "Users" section located on the left-hand navigator.
- On the Users Manage tab select the "Import" button on the top right.
- Upload your CVS file by simply dragging and dropping the file or selecting upload
 .
. - When complete, select the "Import Now" button.

- Once the file has been uploaded, you will automatically receive one of two pop-up notifications:
-
Successful - Confirming all users were imported successfully. Click "Finish" to complete your import.

-
Unsuccessful - You will see a pop-up notifying you that some users failed to upload correctly; these can be viewed, downloaded, and use in the available link.

-
CSV UPLOAD ERRORS:
- Make sure your file is a CSV file and not a spreadsheet.
- The header row can not have punctuation in it.
- No cells in your spreadsheet can contain paragraphs.
- Check if your email column is missing emails.
- Ensure email addresses have been entered correctly.
- Ensure the Role has been assigned to the user
- Check the extension has no letters in it.
- Ensure the Data Center fields have the two letter code for the data center the user will be assigned.
-
Successful - Confirming all users were imported successfully. Click "Finish" to complete your import.
- Once you have corrected any errors, you can upload your sheet using the same steps listed above.
- Note: If you upload the same CSV file twice, your contacts will NOT duplicate.
